learn the step-by-step
process of our trim guide
How To Use & SET-UP Your Trim Guide
We’re here to help you get the best experience when you use Door Trim Guide. Its simple usage allows you to move quickly and accurately with extreme precision.

step # 1
Clamp the guide to a stable surface with ridge (fence) facing up. For a 7 1/4" saw use a 24-60 tooth blade.

step # 2
Position circular saw so that the base plate of the saw is touching the fence of the guide.

step # 3
Cut the guide with your saw. Let the guide cool for a minute, remove any residue from the cut edge.

step # 4
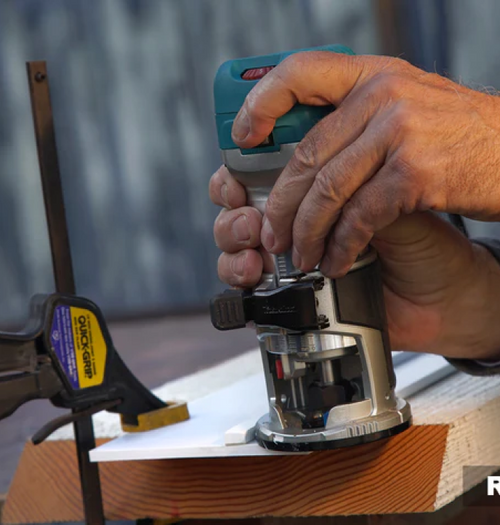
The Saw Guide can also be cut with a table saw to fit other equipment such as routers & jig saws.
explore different tutorials

Our Trim Guide sizes
Door Trim comes in four sizes (4ft, 8ft, 12ft and 16ft) in length.
Use the guide to cut stock with no assistance. Make highly precise cuts using your own saw or router.
Trim Guide works well when cutting on uneven surfaces, is useful for mass production and perfect for cutting material from wood, to stucco, to stone and concrete. It’s resistant material makes it great for outdoor work and is impervious to weather!
All our guides are made in the USA and with main components made from recycled plastic!
Get Precise Beveled
Cutting With Your
16” Beam Saw
With a Trim Guide you can make precise jigs that do not warp with moisture, sun, or snow. Precutting a Trim Guide can be done with a table saw or your beam saw. One pass and you’re done.
Set up guides for bevel cutting or straight cuts and your next bit of millwork means all you do is securely fasten the guide to your lumber and get to work. Made mostly from recycled plastic, Trim Guides will not crack, chip or get brittle.


Get CNC accuracy on
long cuts with your
4-1/2” battery saw
If you’re trying to cut down on packing gear into the field, try using a high powered battery 4-1/2” circular saw with a Trim Guide and you’ll get CNC precise, scratch free cuts for doors, countertops and laminates. Precutting a Trim Guide can be done by making 1 pass with your saw and you’re done. The Trim Guide now shows you exactly where your blade will cut, with no layout.
Set up guides for bevel cutting or straight cuts and your next bit of millwork means all you do is securely fasten the guide to your work surface and you’re ready.
With a Trim Guide you can make precise jigs that do not warp with moisture, sun, or snow. Made mostly from recycled plastic, Trim Guides will not crack, chip or get brittle.
Cut out wall openings
for Windows & Doors
Vertical cutting can be a challenge especially if you’re cutting a rough surface, like beveled siding, brick, stone, or course stucco. You can accomplish any of these using a Trim Guide and your own saw for wet or dry sawing. Made mostly from recycled plastic, Trim Guides will not crack, chip or get brittle. They can be drilled to allow you to fasten with screws or duplex nails directly to the work surface.
Trim Guides can be cut to fit into tight spaces and around obstacles with circular saws or jig saws. Once you have your wall saw set up to cut, now you need to precut the Trim Guide to fit. Measure from the outside edge of the saw base to the inside face of your blade.
Precutting a Trim Guide can be done by making 1 pass with your saw, using a standard wood blade, or a table saw. The Trim Guide now shows you exactly where your blade will cut, with no layout.Set up guides for bevel cutting or straight cuts and your next bit of millwork means all you do is securely fasten the guide to your work surface and you’re ready.
With a Trim Guide you can make precise jigs that do not warp from water, sun, or snow.

Have a question? We are here to help.
Check out the most common questions our customers asked.
Still have questions? Contact our customer support.

JOIN OUR MAILING LIST!
Get updates on exclusive promos and discounts.
Contact Us
Phone: 949-847-8110
Email: thedoortrimguide@gmail.com
Address: 34111 N. Short Rd
Deer Park, WA, 99006
2023 Trim Guide. All rights reserved.
Privacy Policy
Terms of Service
Legal Disclaimer


